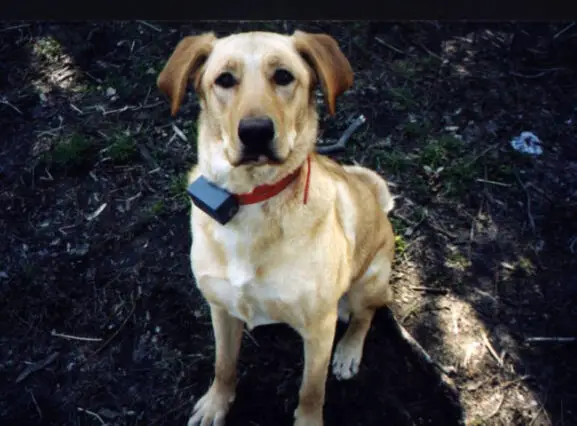
I have 2 dogs (each 55 lbs). I own several WOOF Pupsicle treat toys in 2 different sizes: Large and XLarge. And in 3 different colors: Forest Green, Lavender, and Light Blue.
I give my dogs a dinner snack inside their Pupsicles every single evening.


What Size Pupsicle Toy Is Best?
When I was trying to pick out the best SIZE of Pupsicle toys for my dogs, I wasn’t sure which size would be best for them.
- The smaller one (L) was WOOF’s recommended size, based on my dogs’ breed and weight (mixed breed, 55 lbs each) — so I started with a few in the Large size.
- But I quickly realized that I wanted to have the ability to fit the maximum amount of treats inside (for their larger dinner snack) — so I later bought some bigger ones (XL size) too.


Now that we’ve used both sizes of the Pupsicle toys daily for the past year, I can comfortably say that:
- Using the larger one (XL) allows me to put more of a dinner-sized treat inside. And, of course, it takes them a little bit longer to finish the bigger one (especially if I put something NON-frozen inside, along with something frozen).
- I usually only reach for the smaller one (L) for a change of pace like… when I have plenty of pre-made frozen treats in the freezer and can quickly toss one inside, when it’s not time for their dinner-sized evening snack, when I don’t have the time to manually fill the WOOF toy and just want to give them a quick treat, or when guests arrive and I just need to divert their attention for a short time.
I tend to make up a bunch of “baked” AND “frozen” ball-shaped treats for both sizes of the Pupsicle treat toys ahead of time — and I keep all of the treats in bags in the freezer. (See my favorite “FROZEN Pupsicle recipes” below.)
. photo by Lynnette at TheFunTimesGuide.com")

. photo by Lynnette at TheFunTimesGuide.com")
In this article I’m going to provide you with an EXTREMELY DETAILED review based on my own personal experience using the WOOF Pupsicle treat ball (the rubber toy itself) AND the WOOF starter pack (which includes a Pupsicle treat ball, a 4-treat silicone freezer mold, and a bag of shelf stable refill treats) — all made by Woof Pet, Inc. out of Denver Colorado.

For How Long Does A WOOF Pupsicle Keep A Dog Busy?
The amount of time it takes a dog to finish a WOOF Pupsicle depends on exactly what you put inside — but my dogs tend to finish the Large WOOF Pupsicle in about 20 minutes (it was closer to 30 minutes in the beginning). And they can usually get all the goodies out of an XLarge WOOF Pupsicle in about 30 minutes (it was closer to 40 minutes in the beginning). Like humans, dogs learn to be more efficient over time!
Some super smart dogs *might* figure out how to get everything out of the WOOF Pupsicle within 10 to 15 minutes. The trick is to figure out the perfect combination of “stuffings” that aren’t so easy for your dog get out.
…And that’s what I’m going to help you with today!
The tips & tricks in this article will help you:
- Pick the best (safest) FOODS to put inside your dog’s Pupsicle
- Determine if you & your dog will like WOOF Pupsicles better than KONGS
- Learn the PROS & CONS of Pupsicle treat toys
- Choose the best SIZE Pupsicle for your dog
- FREEZE dog-friendly foods for your dog’s Pupsicle treat ball
- BAKE dog-friendly cakes & chewy treats for your dog’s Pupsicle
- Make RECIPES from scratch for your dog’s Pupsicle toy
- Find the best SILICONE TREAT MOLDS for frozen & baked Pupsicle refills
- SAVE MONEY when making Pupsicle refills for your dog
- Make the Pupsicle treat sessions LAST LONGER each time
- CLEAN the Pupsicle toy quicker & easier
- Solve the problem of Pupsicle LIDS getting stuck
- Teach your dog to lick (NOT CHEW) on their Pupsicle toy
- Find other dog treat toys SIMILAR to the WOOF Pupsicle
One simple tip is to insert items that are much larger than the hole in the center of the Pupsicle toy — so they can’t possibly fall out “on their own”. This makes the WOOF toy much more challenging for your dog — because they have to lick and push at the treat inside long enough until it fits it through the hole and falls out.
For example, I actually like to “wedge in” one or more odd-shaped hard dog treats and leftover nubs from Himalayan Yak Cheese Sticks and Bully Sticks. (See “LEFTOVER NUBS” below.)
When you put something inside that absolutely will NOT come out on its own, most dogs will keep trying at it for a long time. Especially if it smells like their favorite dog chew and/or has bits of food sticking to it.
I think the longest my dog has been challenged with getting the contents out of a WOOF Pupsicle toy is about 1 hour — and that’s really good!
PRO TIP: To make WOOF Pupsicles last even longer, I sometimes put a circular shaped hard chew treat that has a hole in the middle ON TOP as the last layer in a Pupsicle! I put other dog-friendly foods (maybe even “frozen” treats) underneath that. I’ve found that these circular hard chews fit nicely inside the Large and XLarge size Pupsicle toys. (They’re intended to be used with the Busy Buddy Bristle Bone dog chew toy.)


Personally, I’ve found that the WOOF pops in the refill bag really DO seem to last the longest — in terms of “lick time” and keeping the dog occupied with a Pupsicle.
Most of the homemade Pupsicle refill recipes I’ve tried — especially the “frozen” ones — don’t last quite as long as the premade WOOF Pupsicle refills do. That’s because the more your dog licks at a melt-worthy piece of food, the faster that treat will disappear. But the Pupsicle refills don’t “melt” per se, the’re solid treats that just get naturally smaller the longer your dog licks on them.
This is EXACTLY why I like to include some larger chunks of “hard” dog-safe foods inside most of the frozen Pupsicle recipes I make. It’s a little trickier for dogs to get at the harder, solid items inside of a Pupsicle!
I think the best Pupsicle recipe that comes closest to the “original” pre-made Pupsicle refills (in terms of “lick time”) is to use a dog-friendly cake recipe (or mix) OR a soft & chewy dog treat recipe (or mix). Just pour that into some oven-safe silicone dog treat molds and bake. (See my favorite “BAKED Pupsicle recipes” and “best SILICONE MOLDS” below.)
And the NON-frozen Pupsicle refills are absolutely ZERO mess!
The Pupsicle toys themselves are a little more difficult to clean when they’ve had baked (instead of frozen) ingredients inside. And that’s why I’ve included my best tips for “How To CLEAN Pupsicles” below.
WOOF Pupsicle Toys vs. Kongs And Chew Kings

Personally, I like the WOOF Pupsicle treat toys even better than KONG toys these days. (Which is kind of a bummer, since I currently own 10 KONGS.)
And I even like Pupsicles better than the popular (more affordable) knock-off, Chew King treat toys for dogs — of which I own 12!
Why? A few reasons…
5 reasons I like Pupsicles better than KONGS & Chew Kings:
- Since there are so many holes on the Pupsicle toy… no real “suction” is created between the dog’s tongue and the toy itself. As a result, Pupsicles tend to be MUCH less messy due to less slobber being created. That means you won’t find pools of wet drool left behind on your carpet and floors anymore!
- Pupsicles are less noisy while your dog is licking them. With a KONG or Chew King Treat toy, the dog has to work REALLY hard to get at the stuffed and or frozen goodies at the very bottom of the toy — the end with the small hole. But with Pupsicles, since there’s no suction being created between the dog’s tongue and the toy, there is NO constant “sucking sound”.
- You have to “plug” the small hole at the bottom of each KONG and Chew King when you’re filling it — otherwise, anything liquid or runny that you put inside will immediately leak right out. You don’t have to do anything “extra” like this when you’re making WOOF Pupsicles. I’ve never had a Pupsicle leak!
- Pupsicles are much easier to fill — especially when you make up a bunch of Pupsicle refills ahead of time and store them in the freezer. Personally, I can make 60 Pupsicle refills at a time (an entire month’s worth for my 2 dogs) in about 30 minutes! But with KONGS, you can only pre-make as many KONGS that you actually own.
- The homemade WOOF stuffings take up less space in the freezer! I use “round” silicone molds to make 60 Pupsicle refills at a time. And I keep them all inside of two “1 gallon size” freezer bags. On the other hand, KONGS and Chew Kings have to be stored upright in your freezer. The easiest way I’ve found to keep KONGS in the freezer is by using a muffin tin. But… 12 large size KONGS in a metal muffin tin takes up a lot of space inside the freezer. And, with 2 dogs, 12 KONG refills don’t even get us through 1 week!
TIP: To more easily gauge the correct size & shape of treats to put inside a WOOF Pupsicle, put the treats into the smaller part of the toy (which at first seems like it would be “the lid”). Then use the larger “ball” part to screw on OVER the treats — as “the lid”.


What Makes The WOOF Pupsicle Toy So Unique?
The WOOF Pupsicle dog treat toy itself comes in 3 sizes: Small, Large, and XLarge.
Here are the pros and cons about WOOF Pupsicle treat toys, as I see them…
PROS:
- The WOOF Pupsicle toy itself creates less mess than KONGS and Chew King treat toys — due to the fact that less slobber is created (thanks to all the holes on the sides of each Pupsicle toy).
- Since there are no holes in the very bottom portion of the Pupsicle treat ball, any frozen treats you put inside don’t “leak out” as they’re melting.
Slots on the top prevent drool from pooling, there are no holes on the bottom for liquid to leak out, and it’s weighted to stay upright so it won’t tip out food. All in all, it’s about as clean a toy as it gets!
— WOOF Pet
- You can make a bunch of refill treat balls ahead of time using the WOOF silicone tray that comes with the Pupsicle – so you always have some on-hand and ready. (With KONGS, you’re limited to making only as many KONGS that you own.)
- The pre-made WOOF refills that you can buy are similar to a fresh baked cookie consistency — they’re super convenient and easy to use in a hurry or when traveling! They don’t make a mess, and they last a long time.
TIP: To make the pre-made WOOF refill pops last even longer… keep them in the freezer!
- The WOOF toy itself AND the silicone treat trays that come in the starter pack are both dishwasher safe.
- WOOF Pupsicles are especially great for toothless dogs… AND dogs with only a few teeth!
CONS:
- The WOOF Pupsicle is not a “chew toy” per se. They indicate that it’s safe for “moderate chewers,” but it could possibly be chewed through by “aggressive chewers.” So, if your dog tends to chew up toys, consider getting the black Power Chewer Pupsicle instead of the “regular” one. I’m told the black ones are much more durable — but I haven’t tried them yet with my dogs.
- There’s no “stopper” to close off the largest hole like there is with Yipetor’s similar dog treat toy (which I also own). Being able to close off the Pupsicle hole sometimes would increase the difficulty level quite a bit when fresh and/or frozen foods are stuffed inside. It would also enable you to use the Pupsicle as a slow-feeder ball for your dog’s regular kibble.
- The screw-top lid on the WOOF Pupsicle can become difficult to open at times. This is especially true when sticky ingredients make their way onto the “threads” — which is rare in my own experience, but it does happen. (See “STUCK LID Remedies” below.)
- If you happen to pick the wrong size Pupsicle toy for your dog’s size and breed, then the toy COULD get caught onto your dog’s lower jaw. It can easily be removed. But… if you’re not in the same room as your dog at the exact time it happens, then having the toy temporarily stuck on the lower teeth could stress your dog out. When in doubt, WOOF recommends going smaller rather than larger in terms of Pupsicle toy size. Here’s the “official” Pupsicle sizing guide. They also mention the correct Pupsicle size for specific breeds here.


IMPORTANT: If your dog’s jaw (upper OR lower) is capable of slipping through the large hole in the top of the Pupsicle, then WOOF recommends sizing down. You want to make sure that “the space between your dog’s two canine teeth” (upper AND lower) is wider than the diameter of the largest hole in the Pupsicle.
5 Budget-Friendly Tips For Filling A WOOF Pupsicle
Are you pinching pennies? Trying to stick to a budget?…
(Who isn’t these days, right?!)
Here are some money-saving tips for stuffing your dog’s Pupsicle toy:
- Instead of using the special round-shaped silicone molds to freeze Pupsicle refills ahead of time, you can use “regular” ice cube trays or ANY other silicone molds — because the food you put inside doesn’t NEED to be a certain shape in order to work inside a Pupsicle!
- Another good idea when you’re on a budget is to water down anything that you’re going to freeze for your dog’s Pupsicle. This even includes foods like Yogurt, Pumpkin, and Broth. You’ll greatly increase the number of treats you can make simply by diluting everything with water — and your dog won’t even notice!
- You can freeze 1 single piece of ANY dog-friendly human food in water (like 1 piece of broccoli, for example). This makes a healthy, low-budget, flavored ice cube for your dog! And flavored ice cubes of any size will easily fit inside your dog’s Pupsicle toy.
- To avoid buying “extra” foods for your dog’s homemade Pupsicle treats, just freeze some dog-friendly foods from your own garden! (See “Human Foods NOT Safe For Dogs” below)
- My dogs help me clean out my pantry… I give them a small portion of canned foods that are close to expiring. Just make sure that they’re safe for dogs first using the list below! (TIP: If you’ve got too much of a canned food to fit inside the Pupsicle, I recommend freezing the leftovers in a silicone mold — with some water OR some liquid from the can itself.)


3 Ways To Serve WOOF Pupsicle Treat Toys
I think the reason dog owners Iike WOOF Pupsicle treat toys so much is because they’re incredibly versatile!
You can stuff inside a Pupsicle the following types of ingredients:
- FROZEN foods — you can freeze lots of different items in silicone molds that are perfectly sized for your dog’s Pupsicle
- BAKED foods — I also like to use oven-baked dog-friendly cakes and chewy homemade dog treats inside the Pupsicle sometimes
- FRESH foods — you can put dog-safe foods straight out of the can, the bag, or the fridge into your dog’s Pupsicle
In this article I will share with you with a list of dog-safe ingredients that are perfect for stuffing your dog’s Pupsicle.
I’m also going to provide you with a slew of EASY “combinations” of ingredients — Pupsicle recipes that aren’t difficult at all to make for your dog!
Be careful NOT to include any human foods that have been prepared or cooked with these ingredients: Chocolate, Grapes, Macadamia nuts, Mushrooms, Onions, Raisins, Walnuts, Xylitol and other sugar-free sweeteners. (Here’s the complete list of human foods NOT safe for dogs.)
Let’s start with my tips for freezing various combinations of hard and soft foods in round silicone molds for the Pupsicles…
#1 – Frozen WOOF Pupsicle Recipes
Following are the best foods to FREEZE and serve in a WOOF Pupsicle toy,
Sometimes I “layer” and other times I “mix” a variety of dog-safe human foods inside the sphere-shaped silicone molds — both, the silicone trays that came in the WOOF starter pack AND others that I purchased online. (See my favorite “SILICONE MOLDS” below.)
The EASIEST frozen Pupsicle recipes to start with…
- Combine in a bowl: some mashed up Watermelon OR some mashed up ripe Bananas. Freeze inside the dog treat silicone trays. (TIP: You could also add some Water OR some Broth to make these treats more “icy” solid — similar to human popsicles!)
- Mix in a blender: chunks of fresh Fruit. Once pureed, pour into silicone dog treat molds. Then freeze in the trays. (TIP: You could use one single Fruit OR any combination of these: Bananas, Mangoes, Watermelon, Peaches, Blueberries, Strawberries.)
- Combine in a bowl: some steamed Carrots + some steamed Broccoli. Chop the vegetables and put them into the silicone treat molds. Top each one with some Milk OR some Yogurt OR some Broth. Then freeze.
- Mix in a blender: some Celery + some Watermelon + ½ c. Water. Blend until no chunks remain. Pour into silicone dog treat molds and freeze.
- Combine in a bowl OR large glass measuring cup with a pour spout: some Baby Food + some Water. Freeze in the silicone molds.
- Mash 1 c. Raspberries (OR Strawberries) with a fork. Add ¼ t. Chia Seeds (optional) + 1 T. Peanut Butter and mix well. Add ¼ c. Water and combine well. Pour into silicone molds and freeze.
- Combine in a bowl: some dried Oats (OR Quick Oats, cooked) + some Peanut Butter. Shape into balls before freezing on wax paper (or inside the silicone molds).
- Mix in a blender: a few pieces of Watermelon + 1 c. Ice + ¼ c. Broth. Blend until it’s smooth – like a dog slushy! Freeze in the trays.
- Pour leftover Juices from CANNED Tuna, Chicken, Sardines, or Broth directly into silicone dog treat trays. Then, drop in a few solid pieces of Dog Treats AND/OR Kibble AND/OR Fruit. Then freeze.
With all the holes in the Pupsicle toy, you’d think there would be some “mess” left behind on your carpet and flooring – but NOPE! I’ve not once had an issue with leaking or food scraps getting on the floors. I actually think all of the holes are a GOOD thing – they give your dog lots of different angles to get at the treats inside. And when they’re licking from all angles, they’re also licking up any potential mess before it hits your floor!
Frozen Pupsicle recipes using DRY DOG FOOD (kibble) as the base…
- Mix in a blender: 1 c. Kibble + a little bit of Water (OR Broth) + 2 T. Peanut Butter. Pour into the silicone trays and freeze. (TIP: You could also add a little bit of Fruit… Either toss fruit pieces into the blender with the other ingredients OR just include larger fruit chunks in the silicone tray along with the blended ingredients to give your dog a change in texture.)
- Combine in a bowl OR in a blender: 2 c. ground Kibble + 1/2 c. Peanut Butter + 2 c. of 100% pure Pumpkin + 1 c. ground Oats + 3 T. Honey. Roll into balls. Freeze in the silicone trays OR on wax paper.
- Combine in a bowl OR in a blender: some Kibble + some powdered Milk + some warm Water. Freeze in the trays.
- Combine in a bowl: 1/2 c. Kibble + 2 very ripe Bananas + 1 c. plain Yogurt + ½ c. Peanut Butter + 1 T. Honey. Mix well before freezing in the silicone trays.
- Combine in a bowl OR in a blender: some Kibble that you’ve pre-soaked in Water (OR Broth) for 1 hour + some Applesauce. (TIP: The ratio should be a little more Applesauce than Kibble IF you want it to be popsicle-like and last longer for your dog.)
- First, scoop a heaping spoonful of Peanut Butter into the silicone dog molds. Then, press several pieces of your dog’s Kibble into the Peanut Butter. (TIP: You could also add some Water OR some Broth to make these treats more “icy” solid — like human popsicles.)
If you soak your dog’s regular Kibble in Water or Broth first, it will take up more space inside the Pupsicle toy and become less “lickable” (more “difficult”) for your dog to get all of the goodies out of the toy!
Frozen Pupsicle recipes using WET DOG FOOD (canned) as the base…
- Fill silicone dog treat molds half-way with Broth. Add 1 T. canned Wet Dog Food. Fill the silicone treat molds to the top with Water. Then freeze.
- Combine in a bowl: 1 can Wet Dog Food + some plain Yogurt. Place into silicone trays and freeze. (TIP: You could also add some 100% pure Pumpkin.)
- Put some Peanut Butter on the very bottom of the Pupsicle lid. Next, add some Wet Dog Food on top of that. Finally, pour some Goat’s Milk (OR Broth) on top of it all. Freeze in the silicone trays.
To make your dog’s frozen Pupsicles last even longer, freeze an “official” pre-made WOOF refill pop in the very center of some Yogurt OR some Peanut Butter (using the silicone trays).
Frozen Pupsicle recipes using PUMPKIN (not pie filling) as the base…
- Combine in a bowl: some 100% pure Pumpkin + some Peanut Butter + some Water (OR Broth) + little bit of Honey OR Maple Syrup (optional). Freeze in silicone dog treat molds.
- Combine in a bowl OR mix in a blender: some 100% pure Pumpkin + some plain Yogurt + some pureed Strawberry (OR other pureed Fruit). Freeze in silicone dog treat molds.
- Combine in a bowl: some 100% pure Pumpkin + some Banana + some Peanut Butter. Freeze in the silicone trays.
- Combine in a bowl: some 100% pure Pumpkin + some cooked Sweet Potato + some Blueberries (OR other pieces of Fruit). Freeze in silicone dog treat molds.
- Combine in a bowl: some 100% pure Pumpkin + some Applesauce + some Peanut Butter. Freeze in the silicone trays.
- Combine in a bowl: some 100% pure Pumpkin + some canned Tuna. Freeze in the silicone trays.
WHATEVER you decide to fill the silicone trays with… before freezing them, I always like to put a little “extra” dog treat on top – so it sticks halfway IN the silicone tray and halfway OUT of the tray.
Frozen Pupsicle recipes using YOGURT as the base…
- Mix in a blender: some plain Yogurt + some Cantaloupe. Then freeze in silicone trays.
- Combine in a bowl OR Mix in a blender: some plain Yogurt + some Peanut Butter + some Banana pieces (OR other Fruit). Freeze in silicone dog treat trays. (TIP: You could also add some Dog Treats and/or pieces of your dog’s Kibble to this recipe.)
- Combine in a bowl: some plain Yogurt + 1 Egg (microwaved for 1 minute) + some Peanut Butter. Then freeze in the trays.
- Combine in a bowl OR large glass measuring cup with a pour spout: some plain Yogurt + some 100% pure Pumpkin + a sprinkle of Cinnamon. Freeze in silicone molds.
When using watery or slightly runny liquids that you want to freeze in silicone molds, adding 1 teaspoon of Psyllium Husk per homemade Pupsicle treat will naturally absorb much of the water — making it mushy instead of melty! (I usually just open up 1 or 2 of these capsules and mix them in with the liquid ingredients — depending on how “liquidy” it is.)
Frozen Pupsicle recipes using MEAT as the base…
- Combine some cooked Chicken meat in Water (OR Broth). Freeze in the silicone trays.
- Shape some Liver pate (OR Liverwurst) into balls. Spread that into silicone dog treat molds.
- Combine some cooked ground Turkey + some cooked Rice + cooked Sweet Potatoes. Freeze in silicone trays.
- Combine some cooked ground Beef + some pieces of cooked Carrot. Fill each silicone treat tray cavity 3/4ths full. Pour some Broth over the top and freeze.
The cardboard tag that comes with the WOOF Pupsicle has a QR code that you can scan with your phone’s camera to see lots of ”fancy” WOOF Pupsicle recipes.
The FANCIEST frozen Pupsicle recipes I’ve made for refill pops…
- Combine in a bowl: 1 c. of ground up crunchy Dog Treats (AND/OR Oats) + ½ c. Peanut Butter + ½ c. 100% pure Pumpkin + 2 T. Honey + 2 T. Collagen powder (optional) + 1 T. beef or chicken Drippings. Stir together. Roll into balls. TIP: If you want a harder dog treat (similar to an ice cube), then pour some Water (OR Broth) over each “ball” inside the silicone mold. If you want a softer dog treat (similar to the original Pupsicle refill pops), then just freeze the balls by themselves on wax paper.
- Combine in a bowl: 1 can of Salmon (OR Tuna) + 3 T. whipped Cream Cheese + 1 T. diced Cucumbers. Use a fork to mash everything until smooth. Freeze in the trays.
- Combine in a saucepan over medium heat: 1 Apple, shredded + 1 c. Blueberries + 4 Strawberries. Let simmer for 5 minutes – until the fruits are soft enough to mash. Stir and mash well. Add 2 T. Chia Seeds + 1 T. Peanut Butter and mix well. Let cool before placing into silicone dog treat molds. Freeze.
- Combine in a bowl: ½ c. Peanut Butter + 1 c. 100% pure Pumpkin + 1 t. Cinnamon + 3 T. Honey + 2½ c. Oats. Line a baking sheet with parchment paper, then roll the dough into balls that will fit inside your dog’s Pupsicle toy. You can either place the baking sheet in the refrigerator to let the balls harden a bit before placing them inside your dog’s Pupsicle toy. Or, just store them on wax paper in the freezer — and use as needed.
Frozen Pupsicle recipes for your dog’s SPECIAL NEEDS…
- If your dog has a sensitive stomach OR you want to be prepared for the next time your dog gets sick or has diarrhea… Prepare some “bland diet” Pupsicles by combining in a bowl some boiled Chicken pieces + some plain white Rice + some 100% pure Pumpkin. Freeze in the silicone trays.
- Two good Pupsicle recipes for your dog’s “anal gland health” are: (1) First, mix in a blender some Peas + some Broccoli until pureed. Then, freeze in the silicone dog treat trays. Or… (2) First, use a cheese grater to combine in a bowl some grated Carrot + some grated Apple. Then, pour some Water (OR Broth) over the top and freeze in silicone molds.
- For homemade “dog ice cream” mix in a blender 1 c. Coconut Milk + 1 c. Blueberries (fresh or frozen, OR 4 ripe Peaches with skin on) + ½ c. Peanut Butter (OR Almond Butter). Blend until smooth like ice cream! Pour into silicone dog molds and freeze. VARIATION: Mix in a blender 1 c. Cottage Cheese + 1 c. mixed Berries + ¼ c. Water until smooth. Pour into silicone dog treat molds and freeze.
To travel with frozen Pupsicle treat toys... Make frozen Pupsicle pops ahead of time and tote them in an insulated cooler with ice packs (like these TSA-approved ice packs) — they’ll last about 4 hours without melting. OR, just freeze foods that won’t make a big mess should they start to melt – like Sweet Potatoes mixed with Berries OR plain Yogurt mixed with Peanut Butter.
Next, these are my favorite oven-baked food combinations to put inside a WOOF Pupsicle…
#2 – How To Make BAKED Treats For Your Dog’s Pupsicle Toy
While I usually give my dog frozen treats inside their Pupsicles, I do like to bake treats to put inside of them occasionally instead. I think the change in texture motivates them in a different way.
So… I’ll whip up a dog-friendly cake mix (or a soft & chewy dog treat mix) and use THAT inside my dogs’ Pupsicle treat toys. (See “CAKE MIXES” and “CHEWY TREAT MIXES” immediately below.)
Instead of using a “regular” cake pan, cookie sheet, or muffin tin… I just pour the ingredients directly into oven-safe “round” dog treat silicone molds!
I’m not sure if the WOOF refill trays are oven-proof or not, so I bought these cheap oven-safe silicone molds that make treats in the same shape as the WOOF Pupsicle refills (Large size).


I really like how the “top” and “bottom” trays in this oven-safe set seal tightly together to form perfectly round dog treats.
When the treats are done baking, I pop them out of the silicone molds and put them into a gallon-size zippered plastic bag. I keep them in the freezer — the exact same way I store my homemade “frozen” Pupsicle refills. That way, I can just grab one as needed!
BONUS: You can also use these exact same cake pop trays to FREEZE (instead of BAKE) your own liquid-based Pupsicle refills! They can be used 2 ways: (1) You can simply fill each “side” of the cake pop tray separately – as it’s lying flat on a cookie sheet or sturdy cutting mat. Then, after they’ve been baked/frozen, you just put 2 of them together to form a “ball” — they’re the perfect size for the Large Pupsicle toy! Or… (2) You can fill each side of the cake pop tray and then right away “snap” each side of both top & bottom trays together — so they’ll form a ball on their own while baking/freezing.


My favorite DOG CAKE MIXES:
- Puppy Cake Dog Birthday Cake Mix – They have several different flavors to choose from. I bought the Peanut Butter one for my dogs and cooked it in sphere-shaped silicone molds.
- The Lazy Dog Cookie Co. Bake At Home Dog Cake & Treat Mix – Their vanilla cake mix for dogs come with confetti sprinkles.
- The Pawstry Shop Cake Mix For Dogs – This cake mix for dogs is flavored like Peanut Butter Banana. (And they frequently have coupons on Amazon to make the price even more affordable than it already is!)
- Pooch Cake Dog Cake Mix – Love the sprinkles! They have 4 different flavors to choose from.
- Bocce’s Bakery Cake Mix For Dogs – This cake mix is wheat-free, soy-free, and made in the USA. The flavors are cranberry, blueberry, and vanilla.
- Three Dog Bakery Ultimate Celebration Cake Mix – Vanilla cake mix for dogs… includes the frosting!
My favorite DOG CHEWY TREAT MIXES:
- Barley’s Bakes Wheat-Free Dog Cake Mix – I love that this dog-friendly cake mix can be made even faster in the microwave! (And they often have Amazon coupons too.)
- Coopers Mixes – These dog treat mixes are quick and easy to make… just add water! (See my detailed review of Cooper’s DIY Dog Treat Mixes here.)
My favorite HOMEMADE BAKED Pupsicle recipes for dogs…
Remember, you can use oven-safe silicone molds (see “SILICONE TREAT MOLDS” below) to create the perfect-sized baked treats for your dog’s Pupsicle OR just use a “regular” cake pan, muffin tin, or cookie sheet.
When using “regular” cookware, I like to roll the dough into balls that will fit inside my dogs’ Pupsicle toys. You could also cut, slice, or break off chunks that will fit inside your dog’s Pupsicle toy. (While the baked items are still warm, simply break the treats into smaller pieces OR use a pizza cutter.)
If you’re not going to immediately fill your dog’s Pupsicles with the fresh-baked treats, then freeze the treats in freezer bags.
You could also put some small pieces of the fresh-baked dog treats into silicone dog treat molds with some liquid (Broth OR Water OR watered down plain Yogurt OR watered down 100% pure Pumpkin) on top and freeze!
Okay, these are my favorite BAKED recipes for Pupsicles:
- Combine in a bowl: ¾ c. Flour + 1 Egg + 1 c. Peanut Butter. Roll the dough into small balls and place on a baking sheet. Bake at 350°F for 12 minutes — until lightly brown. (These are chewy cookies!)
- Combine in a bowl: some Oats + some Peanut Butter + 1 Banana. Bake at 350°F for 20 minutes.
- Mix in a blender: 1 lb. Liver until it is liquefied. Add to the blender: 1/2 c. Blueberries + 1/2 c. Cranberries + ½ c. chopped Parsley + 1 Egg + 3/4 c. Flour. Pour into an oiled pan. Bake at 350°F for 30 minutes.
- Combine in a bowl: 1 can Tuna (drained) + 1 Egg + 1/2 c. shredded Cheese + 1 c. Flour. Mix and press the dough into a cookie sheet lined with parchment paper. (The dough should be very even and not too thick.) Bake at 350°F for 20 minutes. Cut into pieces. Then, continue baking at 275°F for 40 MORE minutes.
- Combine in a bowl: some cooked ground Turkey + some cheddar Cheese + some 100% pure Pumpkin + some Applesauce + some Carrots + some Flour + 2 Eggs + some Baking Powder + a little bit of Honey. Bake at 350°F until it’s firm in the center — like a cake.
- Combine in a bowl: 2 c. Flour + 1 Egg + ½ c. 100% pure Pumpkin + ⅓ c. Peanut Butter. Bake at 350°F for 40 minutes.
- Mix in a blender: 1 lb. of Liver + 3 Eggs + enough Flour to make a batter consistency. Bake at 320°F for 20 minutes.
- Combine in a bowl: 2 c. Flour + 1 c. Peanut Butter + 1 c. Water + 1 can of Tuna (optional). Roll out dough to ¼-inch thickness. Bake at 350°F for 20 minutes.
I’ve trained my dogs to bring their finished Pupsicles to me. How? I simply give my dogs a treat whenever they bring their Pupsicles over to me as soon as they’re done. (That way, I’m not having to go find the empty Pupsicles all the time… and not tripping over them on the floor!)
Now let’s talk about the best “fresh” foods to put inside your dog’s Pupsicle toy! Plus, some clever ways to increase the difficulty level for your dog…
#3 – Ways To Make FRESH Food Pupsicles More Challenging
Whenever I’m making “fresh” refills for my dogs’ Pupsicle treat toys spur-of-the-moment, I just use whatever I have on hand. Basically, that means my dogs get an entirely different fresh treat inside their Pupsicles each and every time. Sometimes it’s just one ingredient, and sometimes it’s many different dog-friendly foods mixed together.
You can use the exact same foods mentioned in the “Frozen” AND “Baked” sections above — only you don’t have to freeze ’em or bake ’em first!
The goal when filling a Pupsicle with “fresh” food is to choose items of various sizes AND that won’t easily fall through the holes.
In addition to the simple tips I mentioned at the start of this article to make your dog’s Pupsicle toy last longer, here are 4 CLEVER THINGS YOU CAN DO with fresh food ingredients that will make it more difficult for your dog to get everything out of their Pupsicle toy…
LAYER fresh dog-friendly foods inside the Pupsicle.
One simple trick is to use your finger to smear some Peanut Butter OR some plain Yogurt entirely inside first. Then, fill the Pupsicle with some of your dog’s regular treats AND/OR some dog-safe human foods.
Here’s one example of a “fresh” layered Pupsicle recipe… First, put a little bit of peanut butter on the very bottom of the Pupsicle lid. Next, add some canned dog food on top of that. Then, combine some Oats and some Peanut Butter together and roll between your hands to form a ball — place that on the very top. Finally, screw the Pupsicle lid onto the toy and serve.
Pre-cooked Meatballs work really well inside the WOOF Pupsicle toy, as well!
When serving the WOOF Pupsicle with “fresh” foods inside (instead of frozen or baked)… I don’t like to use wet, watery, or smelly food items inside the Pupsicle. The runnier the contents are, the easier it will be for them to “leak out” onto the carpet and floors. However… if you freeze those same items (in silicone treat molds), there will be NO mess! That’s why I always freeze ahead of time anything that’s liquid or runny — so there’s absolutely no chance of it leaking out of the Pupsicle.
Include larger CHUNKS of fresh food inside the Pupsicle.
The idea is to insert foods that your dog will have to “work at” a bit in order to get them to come out. Some good “chunky” fresh food ideas include:
- Large fresh Watermelon pieces (no rind)
- Jumbo-sized Marshmallows (only occasionally because they’re pure sugar)
- Odd-shaped chunks of fresh Pineapple
- Any soft & chewy Homemade Dog Treats that you BAKE (in “round” silicone molds… or not)
- Large sections of fresh & mushy Bananas
- Hotdogs or Cocktail Sausages (in moderation)
- Large chunks of fresh Carrots (or even Baby Carrots)
- Long & narrow string Cheese Sticks
- Any jumbo-sized Dog Treats that are super-hard (more crumbly than chewy)
Include a “FROZEN” item inside the Pupsicle, along with the fresh foods.
While you *could* freeze ALL of the ingredients you plan to put inside your dog’s Pupsicle, that’s not what I’m referring to here. I’m talking about including just 1 piece of frozen Broccoli or just 1 piece of frozen Pineapple or any other single dog treat that’s frozen solid. Basically, you could include ANY frozen Fruit or frozen Vegetable that barely fits in the top hole of the Pupsicle! The larger and harder a piece of food is, the more difficult it is for your dog to get out.
For years, I’ve been making frozen dog treat cubes that are the perfect size to “plug” the top of a KONG or Chew King treat toy. (I use these silicone trays to make the frozen treat cubes. The cubes are an octagon shape that fits perfectly in the large hole on top. And it’s SO easy to make a whole bunch of the frozen treat cubes at one time!) Since I’m using WOOF Pupsicles more often than I use KONGS and Chew Kings these days, I like to put one or more of these pre-made “frozen treat cubes” inside my dogs’ WOOF Pupsicles now. No, they don’t “plug” the Pupsicle hole on top, but it’s a cinch to stuff a few of them inside. They make great “bulky treats” when I’m making up some fresh Pupsicles for my dogs on the spur of the moment. (You could always find a silicone mold shape that WILL perfectly “plug” the hole on the WOOF toy — based on your dog’s Pupsicle toy size.)


Insert LEFTOVER NUBS from Bully Sticks (OR some larger “hard” dog chews) in with the fresh foods.
My favorite trick when giving a WOOF Pupsicle treat toy to my dog spur-of-the-moment is to put a large, odd-shaped dog-safe chew inside the Pupsicle — like a portion of a Pig/Cow Ear OR a Cow Hoof dog chew. Choose anything that’s kinda big and kinda hard that will get in the way and prevent any smaller food items you put inside from just falling out of the Pupsicle holes on their own!
To make it even MORE CHALLENGING for your dog, you could fold over a firm piece of dog Jerky Treat OR a Trachea dog chew — and wedge it into the Pupsicle toy. (TIP: These types of dog chews can easily be cut to any size using a pair of scissors or garden clippers.)
The MOST CHALLENGING option would be to wedge inside the Pupsicle a leftover piece of your dog’s Buffalo/Beef Cheek dog chew! Or… if you want to use brand new cheek dog chews (instead of leftover nubs), then try to find one that fits perfectly inside the large hole on your dog’s WOOF toy — without falling out.
You could always give a Pupsicle to your dog just like that… as a “bone ball” with any combination of the above dog bones & chews inside. But I usually like to squeeze in a few other pieces of dog-friendly foods, as well. It just depends on what YOU think will entice YOUR dog to play with the Pupsicle toy longer.
I especially like to put the leftover nubs from Bully Sticks and Collagen Sticks inside a Pupsicle! (You know… the ones that are small enough that your dog could possibly choke on them, yet too big to throw away without feeling like you’ve wasted your money.) This is a great way to get your FULL money’s worth from the Bully Sticks and hard dog chews you buy — which aren’t cheap. Once a Bully Stick becomes small enough to be considered a choking hazard, put it (or a few of them!) into your dog’s Pupsicle toy — with or without other fresh foods inside. Just make sure that it CANNOT fall out of the largest hole on the Pupsicle. (And supervise your dog the entire time to make sure!)
A few good “fresh” food items to stuff inside a WOOF Pupsicle toy along with the hard dog chews are:
- Tiny marshmallows
- Dry dog kibble
- Pieces of vegetables (fresh or frozen)
- Small pieces of bread (with or without peanut butter or yogurt or gravy on it!)
- Pieces of fruit (fresh or frozen)
- Canned/wet dog food
PRO TIP: If you want to be extra-cautious and avoid the choking hazard from small pieces of Bully Sticks… just cut the full-size Bully Sticks into smaller pieces that will fit inside of your dog’s Pupsicle toy, but WON’T fall out. (Ideally, one end of each Bully Stick will be wide enough to prevent it from falling completely out of the toy, yet still poke out enough to give your dog something to chew on.) I’ve found the easiest way to cut Bully Sticks into smaller pieces is to use a pair of loppers from the garden to chop a single Bully Stick into lots of smaller pieces.
In a similar way, you could also use the Pupsicle to give your dog raw bones from the butcher to chew on – without the risk of them being swallowed!
Here’s how… Buy raw bones that are larger than your dog’s mouth. Do NOT cook them. Let your dog chew on them raw. Once the bone gets small enough that it could become a choking hazard, put it inside your dog’s Pupsicle! That way your dog can smell it, nip at it, and even chew at it — especially if one end of it is “narrow” enough to stick out of the Pupsicle and the other end is “wide” enough to prevent it from falling out the holes of the dog toy!
I also like to save the small ends of Himalayan Dog Chews (Yak Cheese), stick them in the microwave to make them larger and easily chewable, then toss those inside the WOOF Pupsicle toys!
Here’s how… Take the Yak Cheese chew away from your dog before they finish it. Microwave the remaining nub – so it gets bigger and easier for dogs to eat. (After a few minutes in the microwave, it turns into a crispy, crunchy dog treat like this — instead of being super-hard like a chew bone.) Finally, let it cool awhile before placing the now-enlarged Yak Cheese nub inside your dog’s Pupsicle toy. Over time, you’ll get a better idea of what size of Yak chew pieces are the best to save and microwave — based on the size of the holes in your dog’s Pupsicle toy.
Silicone Treat Molds For FROZEN & BAKED Pupsicle Refills

In addition to the silicone treat trays that came with the WOOF Pupsicle starter kit, I also bought a few extra silicone molds that make round dog treats about the same size as the Woof treat refills.
Because… the more silicone molds you have, the more “treat pops” you can make at a time!
When you make a bunch ahead of time, you’ll always have plenty of frozen Pupsicle refills on hand — just grab one from the freezer and fill your dog’s Pupsicle, as needed.
NOTE: Oven-safe silicone molds are indicated below
WOOF “Original” Silicone Trays (Pupsicle Sizes & Dimensions)
These are the WOOF treat trays:


Here are some silicone trays that are very similar to WOOF’s, but they have extra spaces for 2 more frozen treats than the WOOF trays:
- LARGE silicone molds with 2 extra cavities by BABORUI
- XLARGE silicone molds with 2 extra cavities by BABORUI
I combine various dog-safe ingredients in the silicone molds and leave them in the freezer for a few hours. Then, I pop them out of the silicone trays and put them into a gallon-size zipper bag. That way, I can just grab one every day when I give my dogs their evening Pupsicle frozen treats!
To determine what size you need to make your own homemade Pupsicle refills, these are the sizes and dimensions of the WOOF Pupsicle refill treats AND toys:
- SMALL WOOF PUPSICLES — Small Pupsicle treat ball refills are 1.25 inches in diameter (10 per bag), and the hole on the Small Pupsicle treat toy is 0.9 inches in diameter.
- LARGE WOOF PUPSICLES — Large Pupsicle treat ball refills are 1.75 inches in diameter (7 per bag), and the hole on the Large Pupsicle treat toy is about 1 inch in diameter.
- XLARGE WOOF PUPSICLES — XLarge Pupsicle treat ball refills are 2 inches in diameter (5 per bag), and the hole on the XLarge Pupsicle treat toy is about 1.5 inches in diameter.
NOTE: The XLarge Pupsicle refill pops don’t fill the “hole” quite like they do on the smaller size Pupsicle toys. The reason for that is… If the refill treats had been made any larger, they would have been reclassified as a “meal supplement” due to the number of calories in them. To avoid that, they decided to make the XL refill treats a tad smaller than they initially wanted to make them. That means… if you’re buying your own silicone molds to make refill treats for the XLarge Pupsicle, 2.5-inch diameter spheres would also fit nicely inside the XL Pupsicle toy!
Round Shaped Dog Treat Molds You Can BUY
Silicone Molds To Make Refill Pops For The XLARGE Pupsicle Treat Toy:
- 2.5-inch “ball shape” silicone mold makes 6 XLarge Pupsicle refills — dishwasher safe
- 2.5-inch “sphere shape” silicone mold makes 4 to 12 XLarge Pupsicle refills — has a built in leak proof funnel, BPA free, dishwasher safe
- 2.5-inch “round shape” silicone & plastic mold makes 4 individual XLarge Pupsicle refills — dishwasher safe, BPA free
- 2.25-inch “circle shape” silicone mold makes 8 XLarge Pupsicle refills — microwave safe, freezer safe, dishwasher safe, and oven safe
- 2-inch “ball shape” silicone mold makes 12 XLarge Pupsicle refills — oven safe, dishwasher safe, dishwasher safe, and microwave safe
- 2-inch “fireworks shape” silicone mold makes 4 XLarge Pupsicle refills — dishwasher safe, microwave safe, oven safe, and freezer safe I love how these produce dog treats in such a unique shape
- 2-inch “sphere shape” silicone mold makes 12 XLarge Pupsicle refills — freezer safe, oven safe, microwave safe, and dishwasher safe
Silicone Molds To Make Refill Pops For The LARGE Pupsicle Treat Toy:
- 1.9-inch “round shape” silicone mold makes 6 Large Pupsicle refills — freezer safe with extra-thick edge to easily release the treats
- 1.78-inch “circle shape” silicone mold makes 6 Large Pupsicle refills — comes with a funnel to fill from top, freezer safe and dishwasher safe
Silicone Molds To Make Refill Pops For The SMALL Pupsicle Treat Toy:
- 1.3-inch “sphere shape” silicone mold makes 12 Small Pupsicle refills — microwave safe, freezer safe, dishwasher safe, and oven safe
- 1.2-inch “ball shape” silicone mold makes 24 Small Pupsicle refills — oven safe, microwave safe, dishwasher safe, and freezer safe
TIP: If your dog can’t reach the treat pop from the top hole, try putting a slice of something inside the Pupsicle first – to prop the treats up a little higher inside the toy. Try a thick slice of frozen banana or cucumber. You could use anything solid really – even a small piece of bread!
How To Clean WOOF Pupsicle Treat Toys
Most people put their dog’s Pupsicle toys in the dishwasher to clean them.
That’s definitely the easiest way to remove food particles from all the nooks and crannies of a WOOF toy! And since the company states that Pupsicles are dishwasher safe, it’s probably a good option.
However, I personally don’t put anything made of rubber in the dishwasher – due to the high heat from both the wash cycle AND the dry cycle. (I figure I’ve spent a lot of money buying my dog’s rubber toys, so I want to do everything I can to make them last the longest amount of time possible!)
In the past, I used to put some of my dog’s rubber KONG toys in the dishwasher – until I noticed the rubber starting to deteriorate (almost immediately) on the ones that had been put in the dishwasher. The rubber became softer, it faded in color, and the rim around the large hole started to feel “sticky” or “gummy” even when the toy was clean and dry. I had to throw away the rubber toys that had been put in the dishwasher after only a few months! But the ones that were never put in the dishwasher still look good as new today… many years later.
So for the WOOF Pupsicle toys… I just give them a good rinse after each use and let them air dry.
- IF there are some food particles stuck in the threads, holes, or grooves… then I’ll use a regular toothbrush (or a fingernail brush) to remove them at the kitchen sink. The sprayer on the kitchen faucet helps a lot too!
- IF there is still some residue in the tiny crevices even after rinsing well and using a brush… then I’ll soak the top and bottom of the Pupsicle in a bowl of soapy water for a short time. Then, later when you rinse them well, everything should be removed.


If The WOOF Pupsicle Lid Gets Stuck…
Yes, the Pupsicle lids CAN sometimes feel like they’re “stuck” or difficult to open… but I think I’ve figured out why!
I have several of the WOOF Pupsicle dog treat toys — in 3 different colors and 2 different sizes:
- Forest Green (L and XL)
- Lavender (L and XL)
- Light Blue (L)
I’ve found that it’s only the GREEN Pupsicle in the Large size that gets “stuck” for me. But never the LIGHT BLUE and LAVENDER Pupsicle toys (of any size).
I’m actually surprised how easy the lids on the LAVENDER and LIGHT BLUE Pupsicles are to unscrew!
PRO TIP: For what it’s worth, I don’t even make a point to match up the Pupsicle pieces by their color. Why bother? They’re exactly the same toys EXCEPT for the color — so ANY Pupsicle “top” fits onto ANY Pupsicle “bottom” as long as they’re both the same size to begin with (both pieces are Large, for example, or both are XLarge).
One Or Both Of These Things *Might* Be True
- The Large FOREST GREEN one is made with a different die (or mold) during the manufacturing process AND that particular die happens to make the “bottom” ever-so-slightly smaller than the the die that is used to make the “bottoms” for the LIGHT BLUE and LAVENDER ones.
AND / OR - The Large FOREST GREEN one is made with a different die (or mold) during the manufacturing process AND that particular die happens to make the “lid” ever-so-slightly larger — or maybe the threads on the lid are spaced slightly differently — than the the die that is used to make the “lid” for the LIGHT BLUE and LAVENDER ones.
My guess is… once WOOF sells all of their existing Large FOREST GREEN Pupsicles, they will re-tool the die for it and future versions in FOREST GREEN will no longer get stuck. But that’s just a hunch.
I also have a theory about the WOOF Pupsicle colors…
WOOF Pupsicles *Might* Be Color-Coded
- FOREST GREEN (original 1st generation WOOF Pupsicle)
- YELLOW (1st generation, limited edition)
- LAVENDER (2nd generation, updated model)
- LIGHT BLUE (2nd generation, updated model, limited edition – primarily sold by 3rd-party distributors)
- RED (3rd generation, limited edition)
- PINK (4th generation, limited edition)
Again, I do not know if any of that is true — it’s just a thought, based on where and when I have personally been able to find the different Pupsicle colors available.
If anyone has info that could shed some light on the Pupsicle colors, please share in the COMMENTS below!
6 Ways To Loosen A WOOF Pupsicle Lid
If the lid becomes difficult to unscrew, here are 6 things you can try:
- Hold it with your fingers inside the toy’s holes. That way, you’ll have a better grip!
- The next time you have the 2 pieces of the WOOF Pupsicle separated, wipe a little bit of olive oil OR coconut oil OR cooking spray on the threads of the toy. One way to ensure that all of the treads get plenty of oil on them… dip the treads of the toy in a bowl of olive oil!
- You could also put the entire Pupsicle toy in a bowl of HOT water – which might loosen the sticky food particles from the treads and loosen the “rubber-on-rubber” grip of those rubber treads.
- Another thing to try: Do NOT screw the lid of the Pupsicle toy all the way closed when serving it to your dog. Yes, everything will still remain securely inside — and it will be easier for you to unscrew it to clean it once your dog is done. Of course, if your dog is a smarty pants, then they *might* figure out how to get the lid off. But I haven’t had an issue with that with my own dogs. In fact, if I noticed them figuring out how to unscrew the lid by themselves, I’d just correct them as they’re doing it (with a simple “nuh-uh”) — which is our sign that they need to stop whatever it is they’re doing. (My dogs also get “bonus treats” for listening to me.)
- You could also put some cornstarch on the treads as soon as you notice that the treat ball is starting to get hard to open. Cornstarch is safe for dogs AND it provides more “slip” than “grip” for the rubber treads themselves.
- Put the entire Pupsicle toy in the freezer for 1 hour or so. Then, try unscrewing the lid from the toy again. It all comes down to science… freezing temps make rubber contract a little bit. So you never know, it might be enough to make the Pupsicle easier to open (as seen in this video):
As a last resort, you can ask for a replacement Pupsicle toy — as long as you’ve owned it for less than 30 days. I’ve heard a lot of positive feedback from others who’ve asked for AND received a replacement. I think they send you a LAVENDER one or LIGHT BLUE one in exchange for the FOREST GREEN one that you send back (at their expense, not yours). For now, I’m keeping the 2 FOREST GREEN ones I own — because I’ve found the workarounds above do work. But, if I’m being honest, I do reach for the LAVENDER and LIGHT BLUE ones much more often than the FOREST GREEN ones.
Think Your Dog Might Destroy A Pupsicle Toy?
If you’re unsure whether your dog would destroy the WOOF Pupsicle toy or not. Or, if you want to keep your dog from “chewing” the WOOF Pupsicle toy you just bought…
I recommend taking a few days to teach your dog how to use a WOOF Pupsicle toy.
It’s easy!

- Start by smearing some Peanut Butter all along the inside of the toy – making sure to get lots of the ridges and grooves.
- Then, give the Pupsicle toy to your dog and watch how they behave.
Most dogs will immediately begin to lick (not bite) the toy to get the Peanut Butter out.
BUT… If your dog starts chewing or biting the Pupsicle instead of licking at the Peanut Butter, then your dog might not be a good fit for this toy.
You could also do this experiment using any other rubber dog toy that you already have – to see if your dog’s natural instinct is to “lick” at the peanut butter or to “chew” at the toy itself. No need to waste money on a toy that *might* not be suited for your dog. (If you’ve already purchased the WOOF toy and need to return it, they have a 30-day satisfaction guarantee!)
Sometimes it just takes a little extra “training” for some dogs to learn that they have to lick, not bite or chew at the Pupsicle toy itself.
Try this…
- When giving the WOOF Pupsicle treat ball to your dog, hold the toy in your hand and let your dog lick at the Peanut Butter inside the toy that way.
- Don’t let your dog remove the toy from your hand.
- If the dog tries to remove the Pupsicle from your hand, just pull your hand with the toy away. (Also, pull your hand with the toy away any time your dog starts biting at the toy.)
Some dogs need to learn how to be patient and “enjoy” their treat toys, while other dogs are just gentle-natured to begin with. Only YOU know what your dog’s natural instincts and behaviors are like – so train accordingly.
From a dog training perspective, you should also assign a “name” or “command” to this new game that your dog is learning.
As a DIY dog trainer for over 30 years, here’s what I would do:
- Every time you give your dog their Pupsicle treat ball, say something like “Do you want your lick toy?”
- Then, hold the Pupsicle toy in your hand and offer it to your dog to lick. As your dog is licking (not biting) the toy, say “Good LICK!”
- Any time your dog attempts to bite at the toy, firmly say “NO bite!” and remove the Pupsicle toy from your dog’s reach. Wait a few seconds. Then give your dog the Pupsicle toy to lick again (still holding the toy in your hand).
- Any time your dog licks the toy, say “Good LICK! Good boy! GOOD lick!” — constantly reassuring your dog that this is the behavior that gives them longer access to the toy.
- But any time your dog starts biting at the toy, firmly say “NO BITE!” and remove the Pupsicle toy from their reach again.
- Repeat this procedure as many times as it takes for your dog to understand.
If you OR your dog seems to be getting frustrated… STOP! As with any type of dog training, it doesn’t work when you and/or the dog are frustrated or confused. Just try again several hours later… or the next day.
Learning a new behavior is a process. Some dogs pick it up right away and quickly learn what’s expected of them (what you will tolerate and what you won’t). Other dogs will push their limits as much as they can – which just means the process will take a bit longer. And that’s OKAY. In the end, the “reward” for both you and your dog is definitely worth it!
Until your dog has proven that they “get it” and can be fully trusted to only LICK (and not bite) at the Pupsicle treat toy, you should continue to supervise (like a hawk!) and remind your dog “NO BITE!” as needed.
Always remove the Pupsicle toy once it’s empty – so your dog isn’t tempted to keep biting at it.
Did you know?… When dogs “lick” things, it produces happy, peaceful, and calming hormones. That’s one of the reasons that it’s good for anxious dogs to lick – to calm themselves. It’s also why mama dogs lick their puppies a lot – to calm and reassure the pups, as well as to clean them.
Not all dogs are food or treat motivated. Mine are. But if yours aren’t, this might not be the best toy for your dog. In that case, you could just use the Pupsicle toy as your dog’s daily slow-feeder bowl (the kibble will fall out rather quickly as your dog rolls it around on the floor).
PRO TIP: My dogs are NOT aggressive chewers — they’ll always stop chewing on something the moment I tell them to. That’s why I can get away with this nifty little trick… To stuff even more treats inside a WOOF Pupsicle, simply don’t screw the lid all the way down tightly! Sometimes I just give it 1 or 2 full twists, leaving SOME of the screw threads on the Pupsicle showing. I usually do this whenever I’ve placed something bulky inside (like a LARGE frozen strawberry or LARGE nub of yak cheese). BUT… if your dog likes to destroy things or is an aggressive chewer, then you probably don’t want to do this – or you might find the contents of the Pupsicle strewn all over your floor once your dog fairly easily “pops” the lid off!
The Bottom Line
I’ve been using WOOF Pupsicle treat toys with my 2 dogs for over a year now. I love them. My dogs love them.
And the silicone molds make it super-easy for me to freeze ahead of time LOTS of fun Pupsicle recipes — using whatever ingredients I already have on hand!
I don’t think my dogs have ever had the exact same recipe twice in a Pupsicle. (Variety is the spice of life!)


Bye Bye KONGS
Pupsicles are definitely one of the very best treat toys for dogs that I’ve found so far.
And as a diehard KONG user for the past 30+ years (back when I got my very first dog) THAT’S saying something!
In fact, ALL 5 of my dogs through the years were raised pretty much exclusively on KONGS. But now, my 2 current dogs are enjoying Pupsicles most of the time instead.
Personally, I’m thrilled to be done with the constant “sucking sounds” — from the dogs repeatedly trying to reach the food that’s stuck at the very bottom of a KONG or Chew King toy.
Oh, and I’m happy to eliminate all of the “excessive drool puddles” on my floors and rugs too — it accumulates when the dogs are using their tongue repeatedly while trying to reach the food at the very bottom of a KONG or Chew King.
All of that “suction” and “drool” from non-WOOF Pupsicles is just so annoying.
Other Treat Toys For Dogs Similar To The WOOF Pupsicle
Here are a few treat toys that are similar to the WOOF Pupsicle and others seem to like them — but I haven’t tried them yet:
If you’ve used any of these, please let me know what you think — and how they compare to the WOOF Pupsicle.
RELATED LINKS:
Here’s the story behind the Denver-based WOOF Pupsicle treat company: