Have a dog (or multiple dogs), but don’t have a fenced-in yard?
Looking for DIY dog tie-out ideas?
We have 2 large dogs and no fence. After doing some research (and a bit of trial and error), we created a no-tangle dog tie out trolley system for our yard!
Following is our simple DIY solution for a tangle-free dog tie out when your yard doesn’t have a fence…
What Our Dogs & Our Yard Are Like

We live on a half-acre with our 2 dogs, but we don’t have a fence yet.
We would really love to fence the entire backyard. But after getting a couple of estimates, we decided to wait a bit until we could free up some finances.
A fence is definitely a priority though — especially since we love to play outside with our son.
We eventually want the ability to keep our dogs contained off-leash and not have to worry about the random neighborhood dogs wandering into our yard.
After spending some time over the Christmas season at our family’s estate in Nashville, I realized that a temporary solution would be to duplicate the multiple dog tie-out my father-in-law built for our dogs to use when we come to visit.

Why This DIY Dog Tie-Out Is Ideal
My husband’s parents live on 2 acres with plenty of trees — 4 of which were perfectly situated to create 2 independent tangle-free dog trolley systems in an ideal location just off of the sunroom of the house.

This set-up works perfectly because:
- The dog tie-out trolleys are easily installed and can be easily removed — each time we come and go for our family visits.
- The dual tie-outs are situated well above anyone’s head — so the yard space is never compromised when we are outside.
- The trolleys give our dogs limited freedom to move about the yard independently — each on their own trolley line.
- It’s also a great way to remain respectful of the neighbors — so our dogs can’t inadvertently wander into their yards during a moment of inattention… or the dogs’ natural instinct to chase a cat or chicken off in the distance and ignore our calls.
Following is a simple tutorial that explains how my father-in-law created the multi dog tie-outs on his property — which I plan to duplicate in our yard sometime soon after we return home.

His thoughtful design ensures that:
- The dogs don’t get tangled in each other’s path (when they’re both outside at the same time)
- A quick set-up and removal process (making these dog tie-outs easily portable)
These DIY dog tie-outs would be perfect for people with “grand-dogs” or someone who has part-time dog visitors!
Materials Used For This Multiple Dog Tie-Out
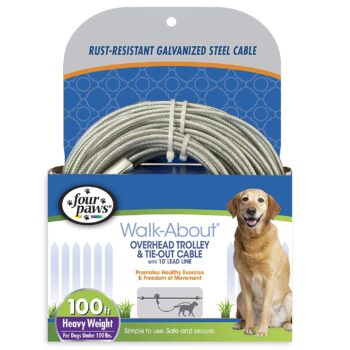
- 2 100-foot dog tie-out cable & overhead dog trolley kits
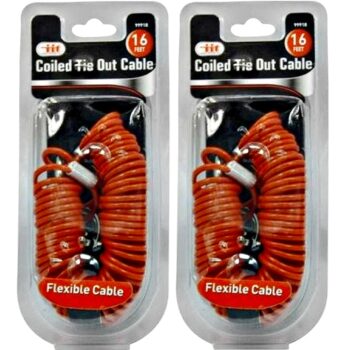
- 2 16-foot coil tie-out cable leashes
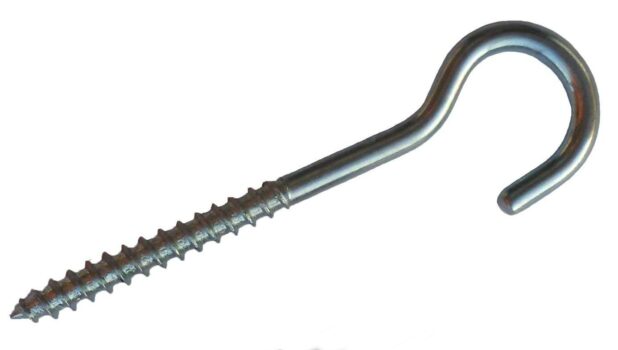
- 2 heavy-duty open screw eye hooks (these were substituted for the ones in the kits)
- Measuring tape – to measure the length of kit needed and distance up from the ground
- Drill with drill bit – to pre-drill holes for open screw eye hooks
- Wire cutters – to cut off any excess cable
- Ladder – to reach mounting points for the open eye screw hooks
- Wrench – to tighten wire clamp screws
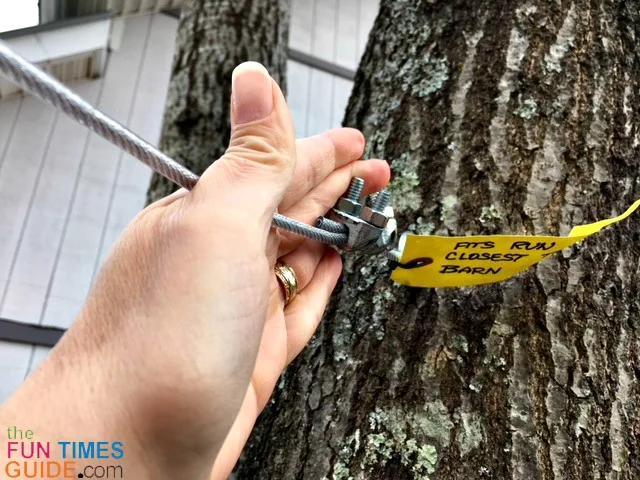
- Tags – to label the separate dog cables, if you have more than 1 dog
- Existing trees or deck posts or frame of house – just be mindful of loose or rotting wood, since it will not provide a secure place to mount the trolley

How To Make This Double Dog Tie-Out
This is how my father-in-law constructed the multi dog tie-outs on his property:
- Determine Your Location
He selected 2 separate trees for each tie-out (4 trees total). From there, he measured the length of each run to determine which length of kit to order. The instructions are included in this particular kit, and they’re relatively easy to follow. He deviated from the instructions in a couple of ways:
– He replaced the 2 closed eye hooks from the kits with 2 open eye hooks (to keep both ends completely removable).
– He replaced the included leash/tie-out piece (the part that connects the dog to the trolley) with a 16-foot coiled one.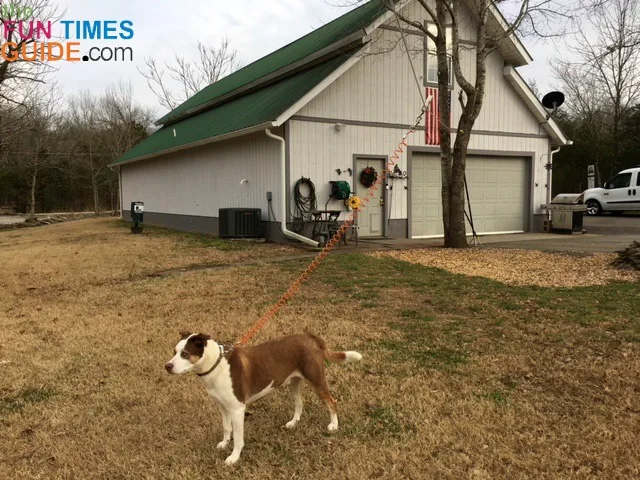
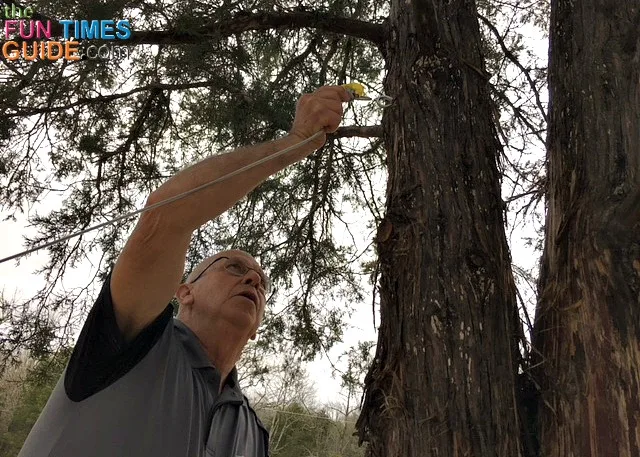
- Measure & Drill
He measured and selected points on each individual tree. He then pre-drilled a small hole for each point to install open eye screw hooks to hold each of the trolley cables. He installed open eye screw hooks to the selected trees at an approximate 8-foot height (to prevent anyone from walking into the cable when using the yard space).
- Connect The Spring
The trolley cable in the kit comes with the absorber springs already attached to one end of the cable line — so the other end is left open to completely customize the length between your 2 selected points. He connected the absorber spring end over top of one open eye hook.
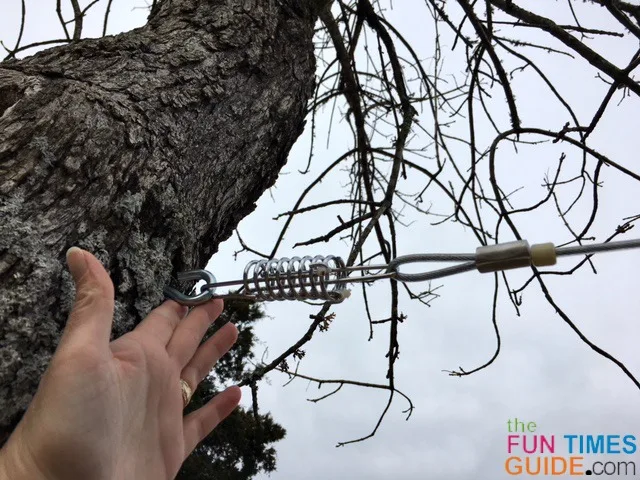
- Add Stopper
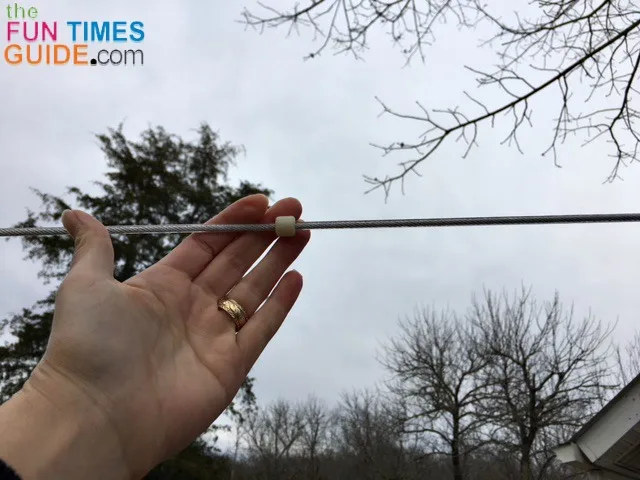
He then slid one of the protective stoppers (basically a plastic bead) onto the open end of the trolley cable, followed by the pulley lead, and then the other stopper. These 3 components are free to move, but stay in the order of having the pulley in between the stoppers once the other end of the cable is looped and closed. (The stoppers prevent the pulley from getting tangled in the cable ends.)
- Tighten Up
Next, he pulled the open end of trolley cable through the other end’s open eye hook and pulled tight until there was no slack in the cable. He closed the loop of the trolley cable by clamping the cable together with the provided wire clamps. He used a wrench to tighten the screws and then cut off any excess cable.
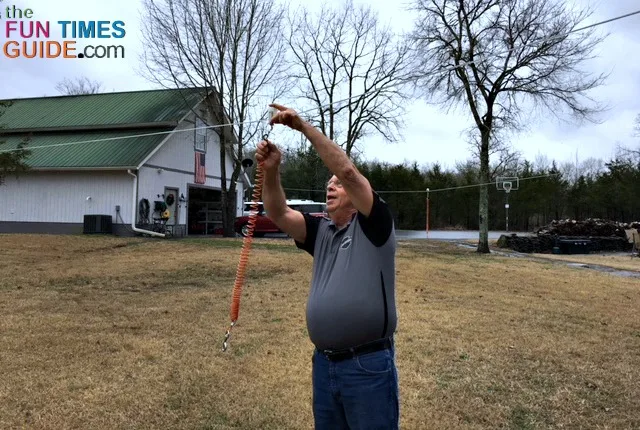
- Custom Tie-Out
As mentioned earlier, he did not use the included dog tie-out leash/cable. Instead, he ordered 2 separate 16-foot coil tie-outs and attached them to the 2 separate pulleys for each run. (The coiled tie-out — or leash — attaches to the bottom of the pulley and the dog’s collar. The coil expands and recoils as necessary when the dogs walk about using the overhead trolley.)
How To Take Down This Multi Dog Tie-Out System
Removing the overhead dog trolley cable when not in use is really simple.
How it’s done…
- First, my father-in-law uses a ladder to reach the mounting points and then pulls either one of the cable ends up and over the open eye hooks.

- Then, he proceeds to unhook the other end.

- Next, he winds up the cable before putting it back into storage.

By the way, the spring absorbers allow for some expansion during the removal process, and they keep the trolley line taut when in use.

The Bottom Line…
I really like the convenience of these removable multi dog tie-outs.

Of course, our dogs don’t really care to be tied up as they are pretty much indoor dogs and spend most of their time next to us as part of the family.
But I think this tangle free dog tie-out trolley system will be a good compromise for our family until we can fence in our backyard — especially on the days when it’s hard to supervise the dogs outside.
I have already ordered the overhead dog trolley kits, coil tie-out cable leashes, and additional open screw eye hooks. And I have an idea of where to run the dog tie-out trolley off of our back deck.
I always learn so much from my father-in-law. He has a real gift of constantly improving the way everyday things function. We, his family, are always the beneficiaries to his thoughtful improvements. And, of course, this multi-dog-tie-out is no exception for his “grand-dogs.”